In this tutorial i will show you how to retouch very bad skin using my retouching photoshop actions and spot healing brush.
--
Update: Even though these photoshop actions works well most of the time, i made huge progress since these actions was relased - I leared photoshop scripting and more about retouching. Check out new skin retouching actions and scripts for photoshop. If you will download the new tools, you will probably never use the old from graphicriver again. Use code GR4BACK and you will get 4$ back at checkout.
--
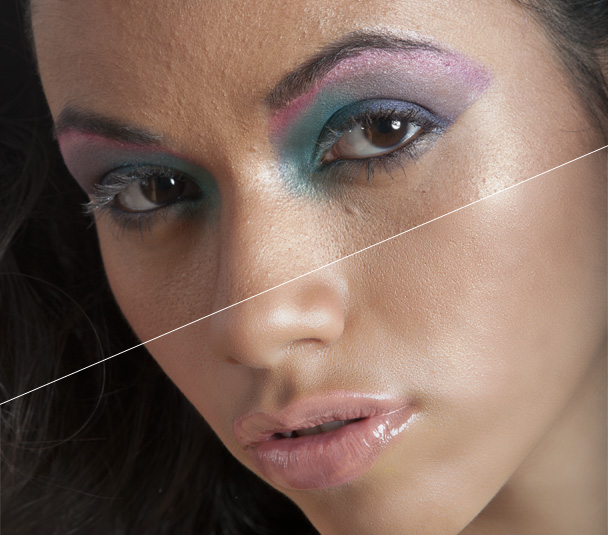
Here is an original portrait shot, cropped to 2736*3648 pixels i will be working with. As you can see, the skin is terrible. Clean this just with a healing brush and clone stamp tool would be a lot of work.
Step 1: Quick skin clean-up with spot healing brush
Before using photoshop actions it`s allways good to make a quick cleaning, just the worst imperfections, eczeme, crabs etc. Do it non-destructively, so duplicate background layer, take a spot healing brush tool and do some cleaning. When you right-click on image, settings show up. I use size 40px, hardness 0% and spacing 20%. Here is my result:

There is not big difference, i just erased most obvious spots.
In the next we will be using mentioned photoshop actions, so install them to your photoshop.
Step 2: using "Quick skin" action
When using these photoshop, you allways must run "Quick skin" action before "Magic brush", otherwise it will not work. Why is that so i will explain later. Make sure your top layer is selected and play "quick skin" action.Now you have new group with layer mask filled with black (black means the layer effect doesn`t apply), white foreground swatch color and brush tool selected . Select layer mask(if is not), set your brush to a big size and 0% hardness(right click on image) and paint over the skin to apply the effect. You don`t have to be very careful, this effect should not be too strong. Here is how my mask looks:

The effect should work on most photos well without any additional adjustments. It`s a soft effect, nothing dramatic. Below is my result:

If your result does not looks similar to mine, you should do some more adjustments. Open the group. You see three sub-groups here. First group called "retouch" soften image and is not changeble, do not open. You have some options only with "Fine" and "Coarse detail" groups. These groups actually sharpen your image to get skin details back after softening.
Try to play with opacity of these two groups, until the result is better. By default are set to 50%.
You can also open these groups (not necessary in most cases) and each group has two sharpening layers inside, each of different radius. Again, just play with opacity to find the best option. When you are done, close the whole group before next step.
Step 3: "Magic brush" action
Close the "quick skin" group if opened, keep it selected (top layer) and run "Magic brush" action. Now it is similar process, make sure that layer mask of new group is selected and foreground swatch is white. Take a brush do some painting over everything you want to erase or soften. I use soft brush (0% hardness) at low flow amount 8% (this option is under menu) and change brush size from 50px to 400px. Sometimes when want to erase, icrease the flow amount. Here is how my mask looks like:
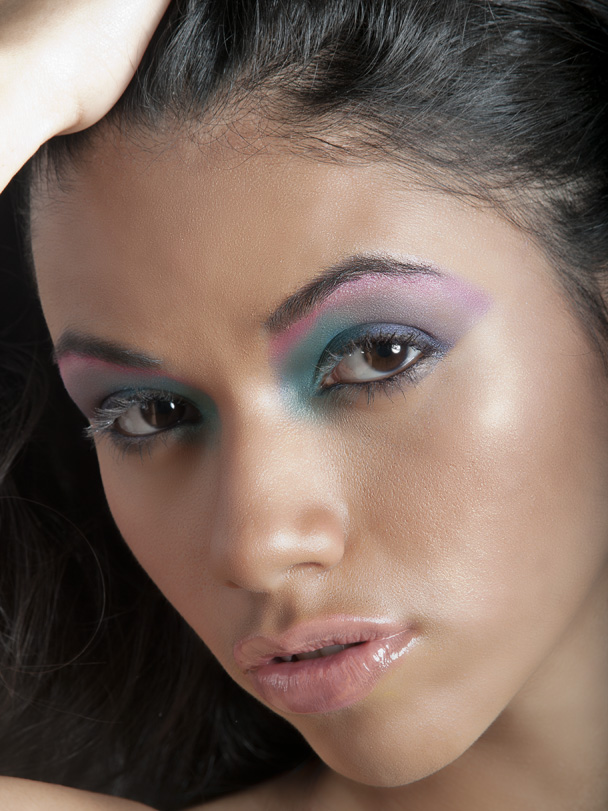
I changed opacity of "Blur-darken" and "Fine detail" both to 80%. Result is below:

Step 4: Finishing
If you see some imperfections on your image now and want make it perfect, you can make a new merged layer with Ctrl+Shift+Alt+E and use spot healing brush, healing brush or clone tools.For eyes and teeth use the "eye doctor" and "dentist" actions, these are easy to use, just play, paint while layer mask is selected and adjust opacity.
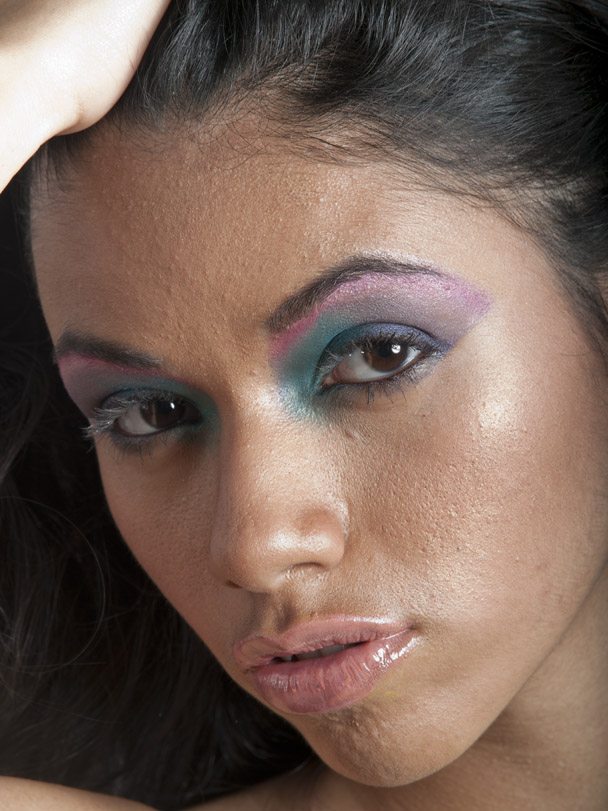
I used just "Light powder" action on my image and decreased opacity to 25%. Here is my result.
Of coarse this image would reqire some retouching on eyebrows, eyelashes, hair etc., but about the skin, the result is pretty good compared to original, i think. The original:
Hope my actions and this tutorial will help your images. Thank you for purchasing my item!
Don`t forget to share if you like ▼▼▼▼▼
Nice tutorial and plugin :)
ReplyDeleteThank you Daniel!
DeleteThis is a very good action...it saved me quite a bit of time.
ReplyDeleteThanks!